


I’m a pretty rare “Lightwaver (endangered species)” who uses “Lightwave 3D” in my work. So I’d like to show you what’s good and bad about “Lightwave3D”!
“Development has stopped…?” or, when talking to industry veterans, “Lightwave is still around!” But by knowing what’s good about Lightwave, you can get ideas that will help you when you use other software. (I no longer expect new people to come in lol)
Maybe this article will help you to “think like a Lightwaver” too!
What is “Lightwave3D”?
Many of you may not know it because we are now in the age of “Blender”, but “Lightwave3D” is an “DCC tool” that can perform total 3DCG production like with “Blender”, “Maya”, or “3dsMax”.
More than a decade ago (maybe even more than twenty years ago?) was called “3DCG DCC tool” along with the following software (really?). It is a 3DCG software that can wishstand even professional use.
People who use Lightwave are called “Lightwaver”. Lightwave has an indle-like feel due to its development history, and this is exactly what makes it “Lightwave-like”.(Please think of it as a bit of a cute way of saying that.)
A famous Japanese Anime film director “Makoto Shinkai”, a famous Japanese game designer Fumito Ueda , and a manga artist Ken Akamatsu who became a Diet, are also “Lightwavers”! (I don’t know if he uses it now…)
It seems that “Lightwave” was also used it “Gran Turismo 1 and 2” and the movie “Titanic”.
Why use Lightwave?
While the world is saying “3dsMax” or “Maya” or “Blender” for Anime CG, “why do we use Lightwave?” It is because Lightwave is naturally easy to use.
If I were to give a brief description of its caracteristics, Lightwave is “simple, intuitive, and easy-to-understand software”.
I have used “Maya”, “3dsMax”, “MODO”, “Blender”, and even “Shade” in the past, but Lightwave is by far the simplest, easiest to understand and learn. I first learned “Lightwave” on my own, but the concepts were the easiest to grasp, and I was able to quickly get to the point where I could create images.
Autodesk-based software tends to have many functions, complicated processes, and complicated and fragile data, but Lightwave is simple and flexible. On the other hand, Lightwave is not suited for doing “complex things” or difficult to do “advanced rendering”. But it is sufficient for use in Anime CG.
There are a certain number of people who are technically weak but have good sense, and Lightwave is a 3D tool that can be easily handled by such people. (Of course, this is a relative term, and a certain level of technical skill is necessary…)
And the big difference from Autodesk-based software is that it is cost-effective while it can be used by professionals. Now that we have “Blender”, it can’t be beat for free, though.
Now, while introducing such “simple, intuitive, easy-to-understand, and easy-to-use parts” of Lightwave, we would like to ask “What’s good? What’s bad?” I’d like to think about it!
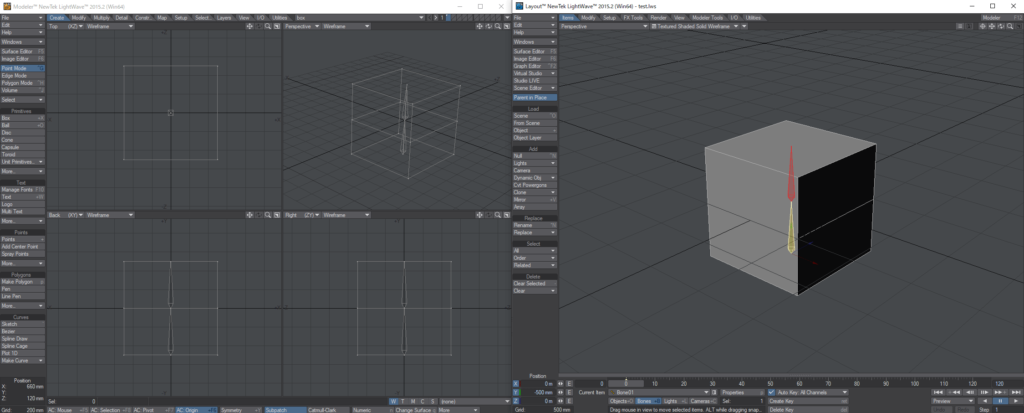
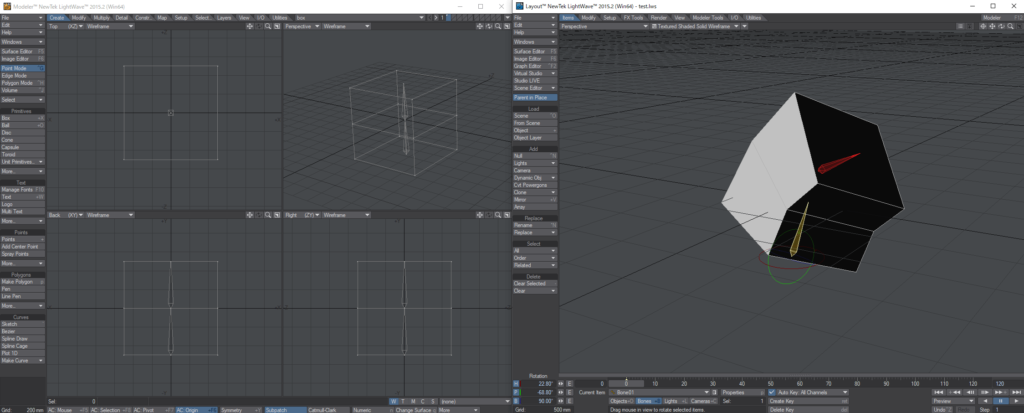
1. Divided into Modeler and Layout.
One of Lightwave’s greatest strengths and weakness is that it is divided into two applications.
Modeler, a software for modeling work.
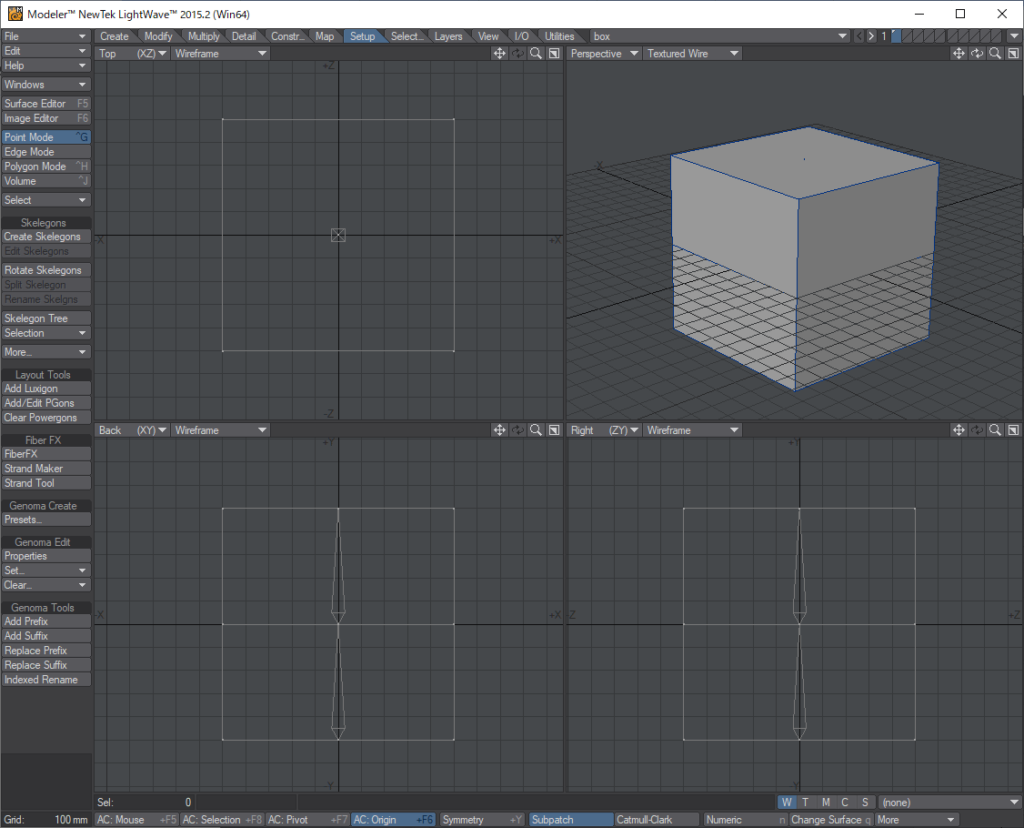
Layout, a software for animation, lighting, and rendering tasks.

Good point of this system #1: References are powerful.
It’s like “models created in Modeler (lwo data) are loaded by reference in Layout and animated (lws data). Other “DCC tools” do not have this structure unless you explicitly “load by reference”, but this is the standard for Lightwave.
This makes it vary easy to “update” or “replace” models. As you can see when you are working on animations, you often find roughness in the setup and models after you start animating, so being able to “fix it later” is an advantage.
Other software can do this as well, but perhaps because it is not a core system, the following problems often occur.
- A little tinkering causes the settings to break down in the scene you are loading.
- If the source scene contains any complex elements, it causes an error.
It is possible to do similar things, and it may be pollible to make it easier by developing plug-ins, but I have yet to see any software that can beat Lightwave in terms of “ease of use in its default state and without specialized knowledge”. Lightwave can be said to be “simple and unbreakable” in this area.
In terms of software design, this is due to the fact that there is a separate software called “Modeler” and the existence of data called “lwo”, and the configuration items (lwo specifications) that can be done and clear. If you can refer to many things, it is assumed that the complexity of the data can easily contain factors that can break it as data.
It’s also simple and easy to recognize by the appearance of the data, “This is the Model’s data”.
Pixar seems to be using “USD” to set up a “more advanced referencing system”. It’s that beneficial to be able to work with the idea that “adjustments can be made later”.
I think there are definitely “retakes” and “I want to fix it later”.
Good point of this system #2: Clear work processes, UI for each process
The roles of each software, “Modeler” and “Layout”, are clear, so the work process is clear and easy to understand.
In addition, the UI is designed for each task, making it easy to work with. Recently, there is specialized software for modeling, animation, simulation, lighting, rendering, and other work processes. This clarifies the work process, and at the same time, shortcuts and other functions are assigned exclusively to that work process, making it simpler and easier to understand.
Blender and MODO have a “pipeline layout tab” that allows you to change the UI depending on the work process. I think it is like that, but for each application.
For example, Layout’s characteristic UI movement is that with an item selected…
- “Drag Left” on an empty space to move to the “XZ plane”.
- “Drag Right” on an empty space to move to the “Y-axis”.
I think it is intuitive that the UI is based on the human perception of whether something should be moved in “flat plane” or “up and down”.
Good point of this system #3: Good Performance
I have not verified this explicitly, but I think that the behavior during animation(Layout) is lighter. According to what I have seen and heard in various places, it is more memory efficient to systematically separate them.
“Performance” is very important factor, and it makes it easier to try and error intuitively.
Bad point of this system: The work process is divied, and elements that straddle.
The “setup” example is easy to understand. In other software, you can adjust the weights while checking the deformation results. This is not possible in Lightwave as a standard feature. (Although it is possible with plugins or for simple elements.)
In this way, the separation of Modeler and Layout can be troublesome in many cases.
There was even an integration plan called “Lightwave CORE” to solve this, but it seems to have failed.(Lightwave-like)
2. Vertex Map
Other software can also set “additional infomation to vertices” such as UVs, weights, morphs (blendshapes), etc., but the “way of holding vertex information” is slightly different between Autodesk and Lightwave. (Strictly speaking, MODO and Blender can do the same thing as Lightwave.)
In “Maya” and “3dsMax”, “Vertex Information” is a separate node/modifier, and “Vertex Infomation such as weights and morphs” is attached by referring to “object vertex number” and other elements. Therefore, if the “vertex number” is changed by editing the shape(topology) after setup, or the shape is badly modified, “Vertex Infomation” will not be applied property, and “what you have created will be broken”. This is very “destructive” kind of editing.
Lightwave is able to edit in a “non-destructive” manner. If the model is edited a little, it will be interpolated from the original shape.
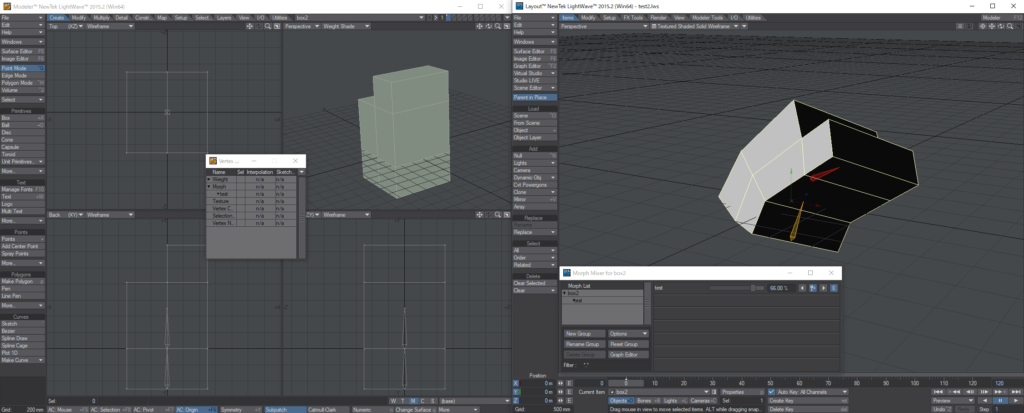
When this “vertex map” and “strong reference” elements are combined, “adjustment after the fact” becomes very effective.
For example,
- You can easily create models with slightly defferent patterns, etc.
- Add morphs(blendshapes) later on and have them reflect immediately.
- Fixing errors in models and weights while the animation is in progress.
The Good point of Lightwave is that you can do thing would normally want to do in a normal and intuitive way.
Also, since the model has information, it is very fast to create a model that can be used over and over again. If you make a body with parts such as hands, you can use the weights even if you change the shape of the body. Another factor that makes it easy to use a skeleton is that it can be transformed together with the model shape. (Although the skeleton must be regenerated on Layout.)
3. Intuitive
Lightwave can do “forcefully and like that” quite well.
One of the charms of Lightwave is that it is possible to do something like that with a certain degree of forcible force.
In addition to the above characteristics of being “non-destructive” and “easy to modify after the fact”, Lightwave has following features.
- Many tools are intuitive.
- If you set it to negative for now, it will do the opposite.
- Even oerations that would cause errors with other software are quite possible.
So even those who are not technically inclined can quickly get used to it. The division into “Modeler” and “Layout” makes the handling of items clear, and the handling of each element in the scene is simple and easy to understand.
Even if you can’t do anything complicated, you can still create the elements necessary for “Anime CG”. Lightwave has a variety of functions for creating images, including particles and many other things. It is not possible to do advanced simulations like those done in Houdini, through.
Lightwave is not good at complicated things, but it is good at “making it looks like that to some extent” by combining and filling in simple elements. For example, this kind of idea is very “Lightwave” like, instead of building a complex rig for a setup.
- You get by with “skeletons” and “morphs” and “displacements”.
- Not to be able to handle everything, but to reconfigure yourself excusively for the shot.
Hierarchical Systems
Lightwave is hierarchical, or rather, it is an feeling of function within a certain object. This make it easy to grasp the image, and in a sence, the “functions” are all there, making it simple and easy to understand.
Modern systems these days are like “everything is node”, and the makin idea is “how to build it by combining elements”, but this requires a great deal of technical ability. (This is a better way to do complex things.) Lightwave also has a “node” function, but it is implemented in parts, and I think it is harder to handle than software like “Houdini”, “Maya”, “Blender” or “MODO”, which can handle almost all so-called elements as nodes.
Thinking on an Expression Basis
I think “Lightwave” is more suited for people who think in terms of “expression-based” rather than “physics-based” thinking. For simulation, pracise lighting, or complex rigging, it would be better to use “Houdini” or “Maya”, but if you are satisfied with “something like that”, “Lightwave” is quick and intuitive to create. Therefore, I think the way of thinking of “Lightwave” is suitable for “Anime CG”. In “Anime”, it is important to have “something like that”.
CG-like elements have been included since “Lightwave 2018”, but the intuitiveness of “Lightwave 2015” and earlier was particularly impressive.
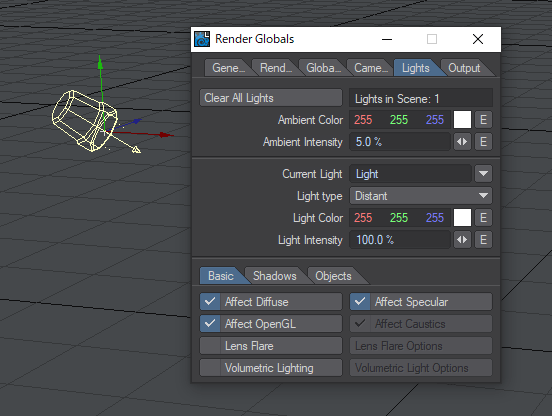
For example, “unit of light” were expressed in mysterious parcentages such as “100%”, and it was even possible to generate mysterious lights such as “-100%”, which would absorb light and darken if set to a nagative value. I think there are many functions that can respond to intuition like “I want to make it brighter!” or “I want it dark here!”.
Also, although it is a modest point, it is nice that the software starts up quickly. You want to start the software as soon as you think of it. I don’t know why Adobe and Autodesk software takes so long to start up…
Unique Lightwave features
The way of set keys is unique.
Lightwave has a setting keys method and consept that is not found in other software. There are “Enter twice” and “Setting descendants”.
Enter twice
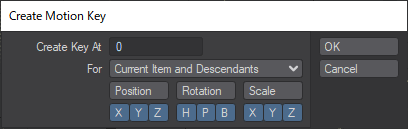
In Lightwave (Layout), the shortcut for setting keys is “Enter” and the shortcut for erasing a key is “Delete”. This is the UI that apppears for each. In the “Create Key At” section, you can set key in the “Transform value of the current item” to the target frame. (By default, the value of the “current frame” is entered, so the key is seted to the current time.)
This is very useful and intuitive for animation work.
You might think, “Why not just adjust on the timeline?” but “fast” isn’t the same thing! In a sense, “fiddling with the timeline” feels the same as editing in Premiere with almost no keyboard.
Setting descendants
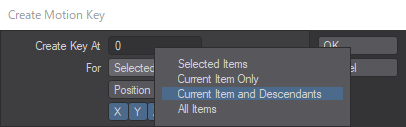
Lightwave has a concept called “Setting Descendants”, which means “Setting keys on current item and its child hierarchy”. This makes it very easy to animate when doing “FK” setups.
In the case of the following conditions found in “Limited CG Animation”, batch key management is often done on a pose basis, rather than the method of attaching editing the graph editor as in real CG animation.
- Picture Making Base.
- “Pose to Pose” method, which is managing by “Key Animation” and “In-between”.
- Small number of pictures
Some software has a function that allows batch keying on a character basis, but in the case of LIghtwave, you can batch key each character without special settings by selecting the “root” item and performing “Setting descendant”, and you can move, copy, and delete keys in a batch as if were typing normal setting keys.
The other bonus is that simply tapping “t-t” feels like “I’m hitting the keys!” and is kind of fun.
Falloff
As for “falloff”, to be frank, “MODO” is stronger, but since the initial developers of “Lightwave” and “MODO” are the same, i can say that they are in the same family…
“Falloff” can be adjusted by pulling out the falloff handle to create a gradient. And this “gradation” can be applied to various elements.
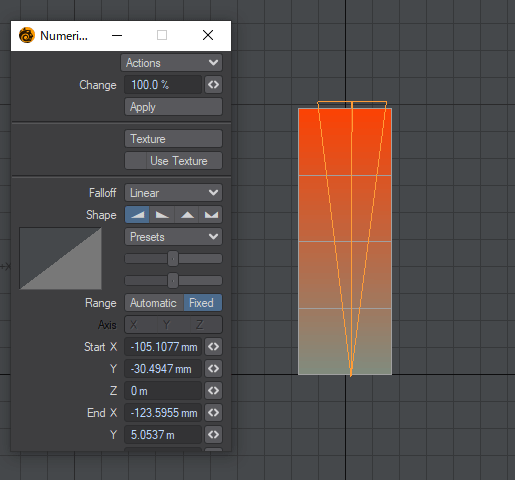
Although it may seem like a common function, “Maya”, “3dsMax” and “Blender” allow you to fluff up with “Brushes” but do not allow you select various types of “Falloff” or adjust the “falloff position” separately like “Lightwave” and “MODO” do. (If anyone knows, please let me know…!)

Summary
There are many features other than those mentioned here, but in general, the good thing about Lightwave is that it is simple and intuitive. When I go to other software, I often find that they don’t have features that i think, “Why don’t they have that super-simple feature… That a programmer could easily create if he/she wrote it…”
I think it is very rare for someone who is just starting to learn 3D to use Lightwave. (In terms of the number of resources and future expectations, I recommend that beginners choose other tools…!)
However, I hope that the “Good Points” of the concept of “Lightwave” will be helpful to you in using other software.

Comments